CUIVEN.Plan your installation

Atelier drinking water systems

Water, perfected.

Choose the temperature, serving size and sparkle. Add hydrogen, adjust the minerals, or blend flavor and functional infusions. Save your recipe for the next pour.

Installation formats

Built into cabinetry. Or on the counter.

Choose where the dispenser sits. In both formats, the water treatment, heating, cooling and carbonation equipment stay in a nearby cabinet. A permanent water connection means no container to refill.

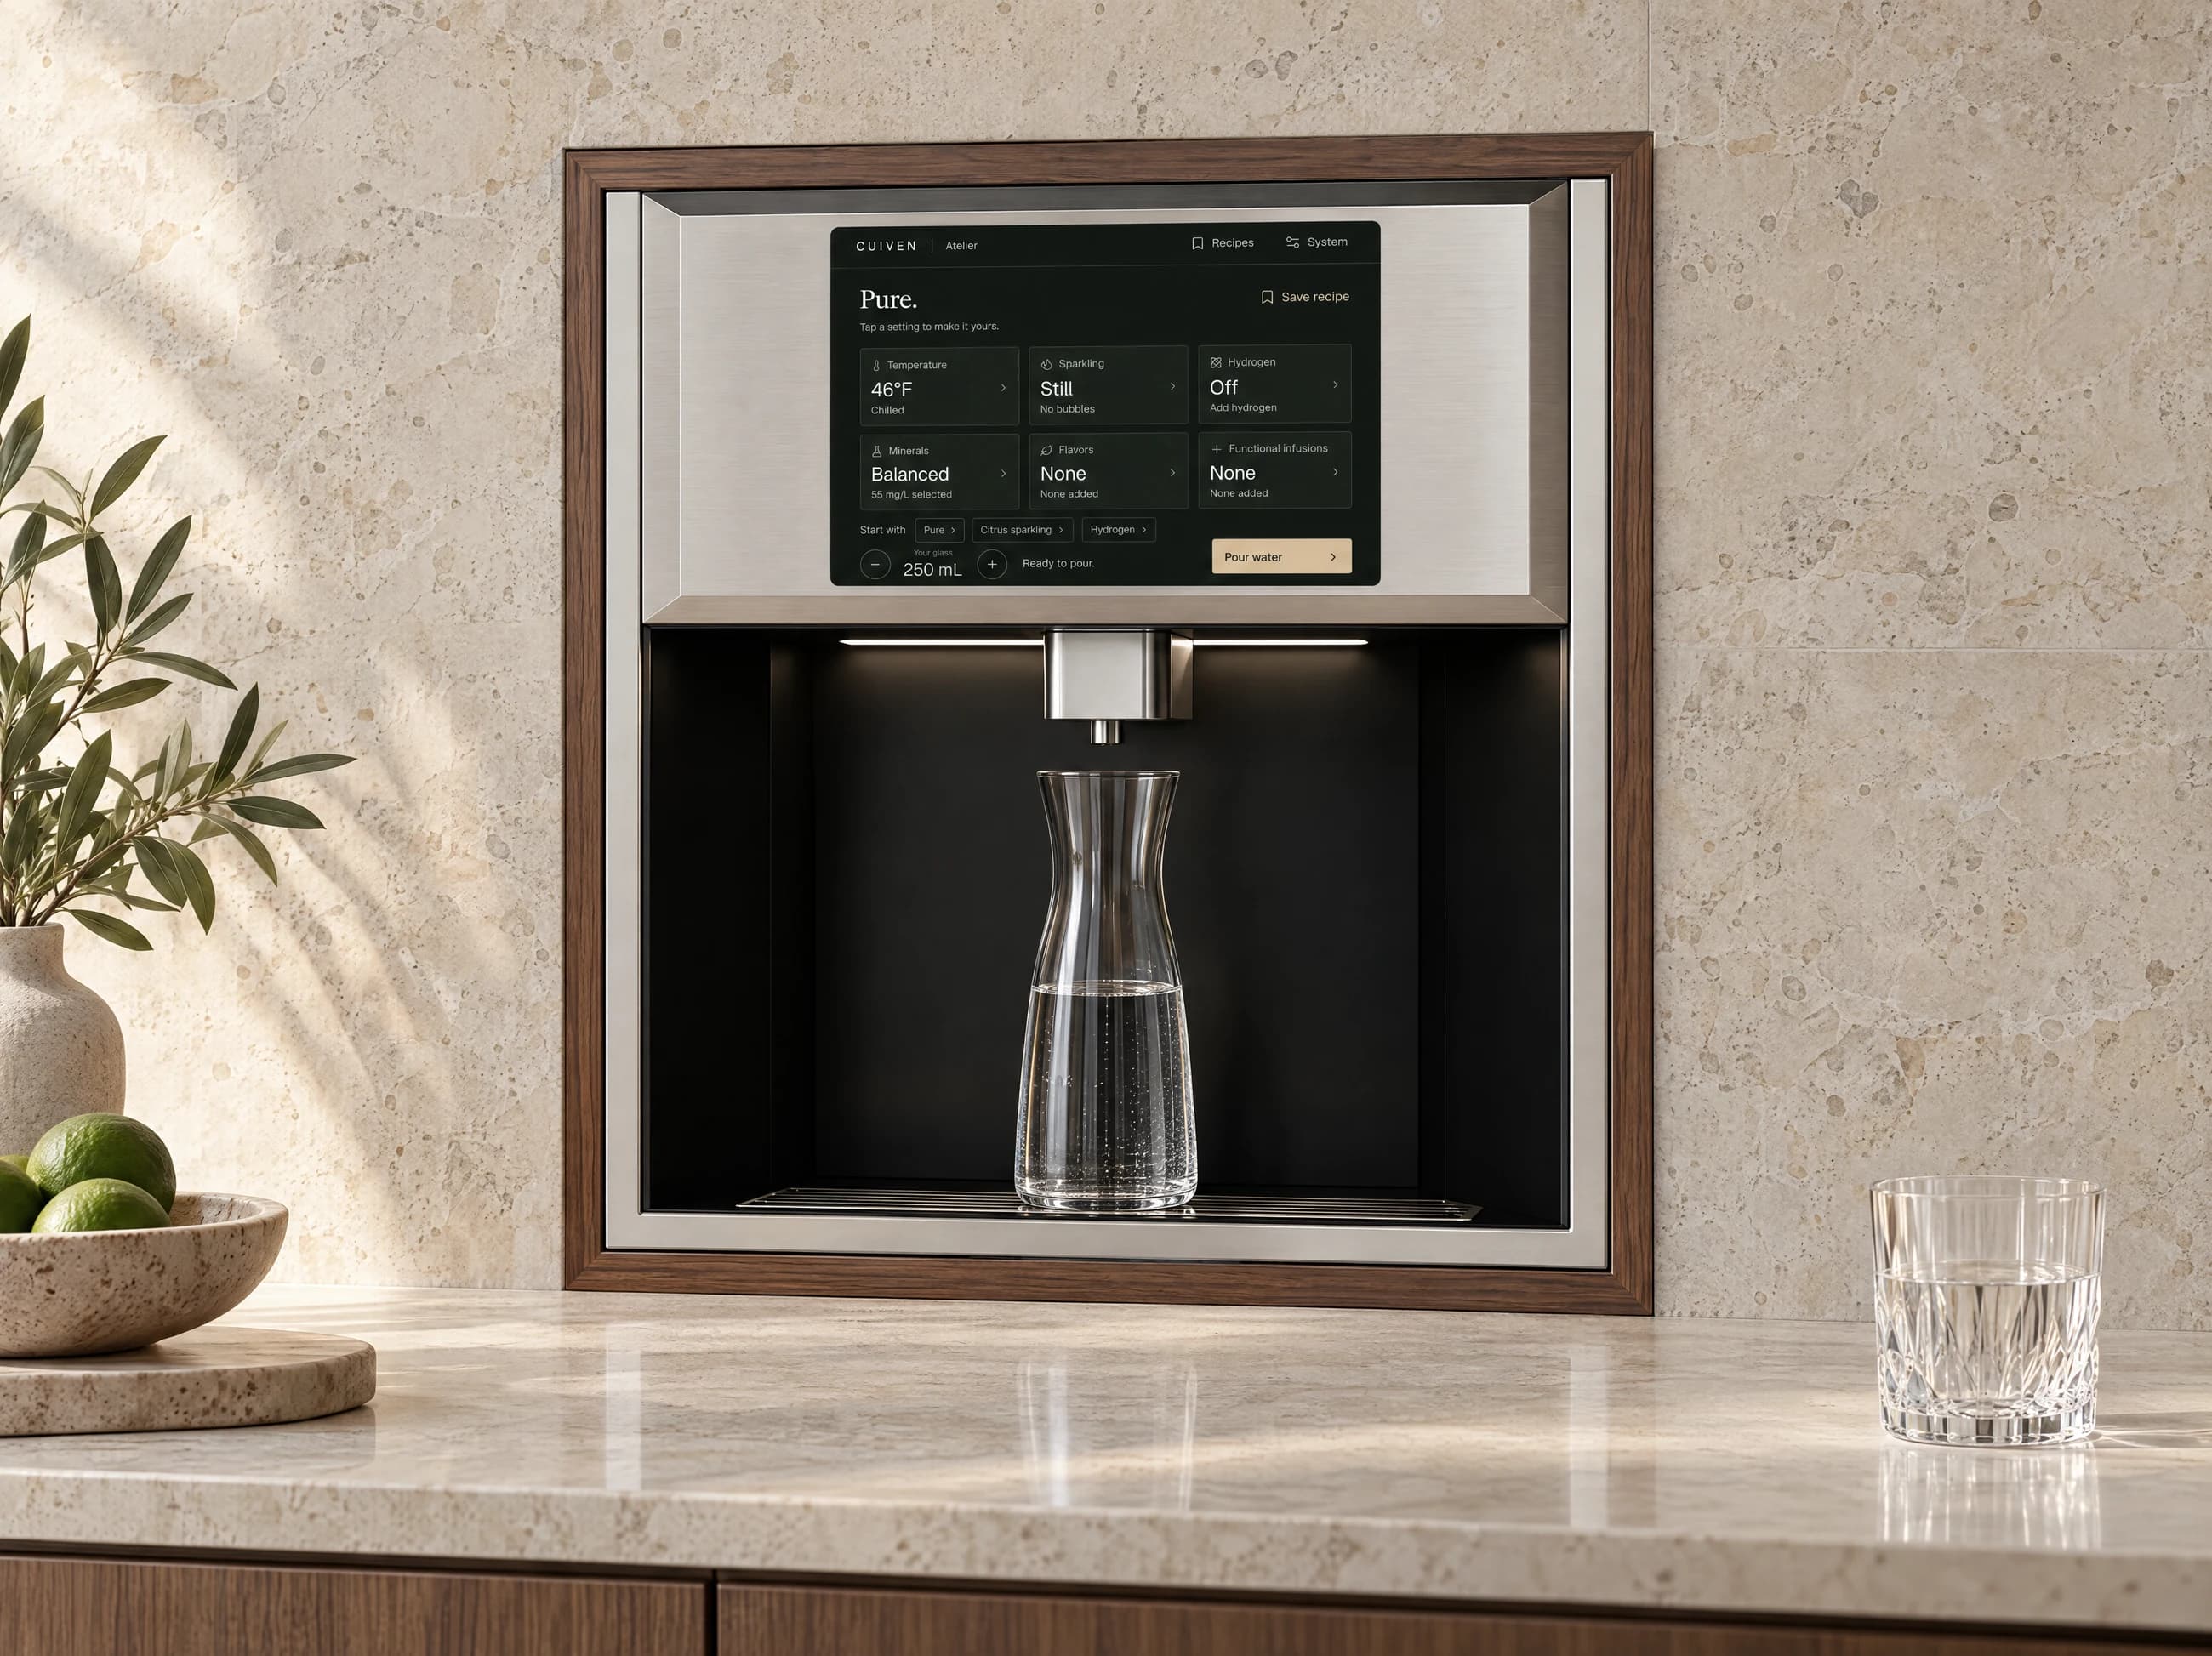
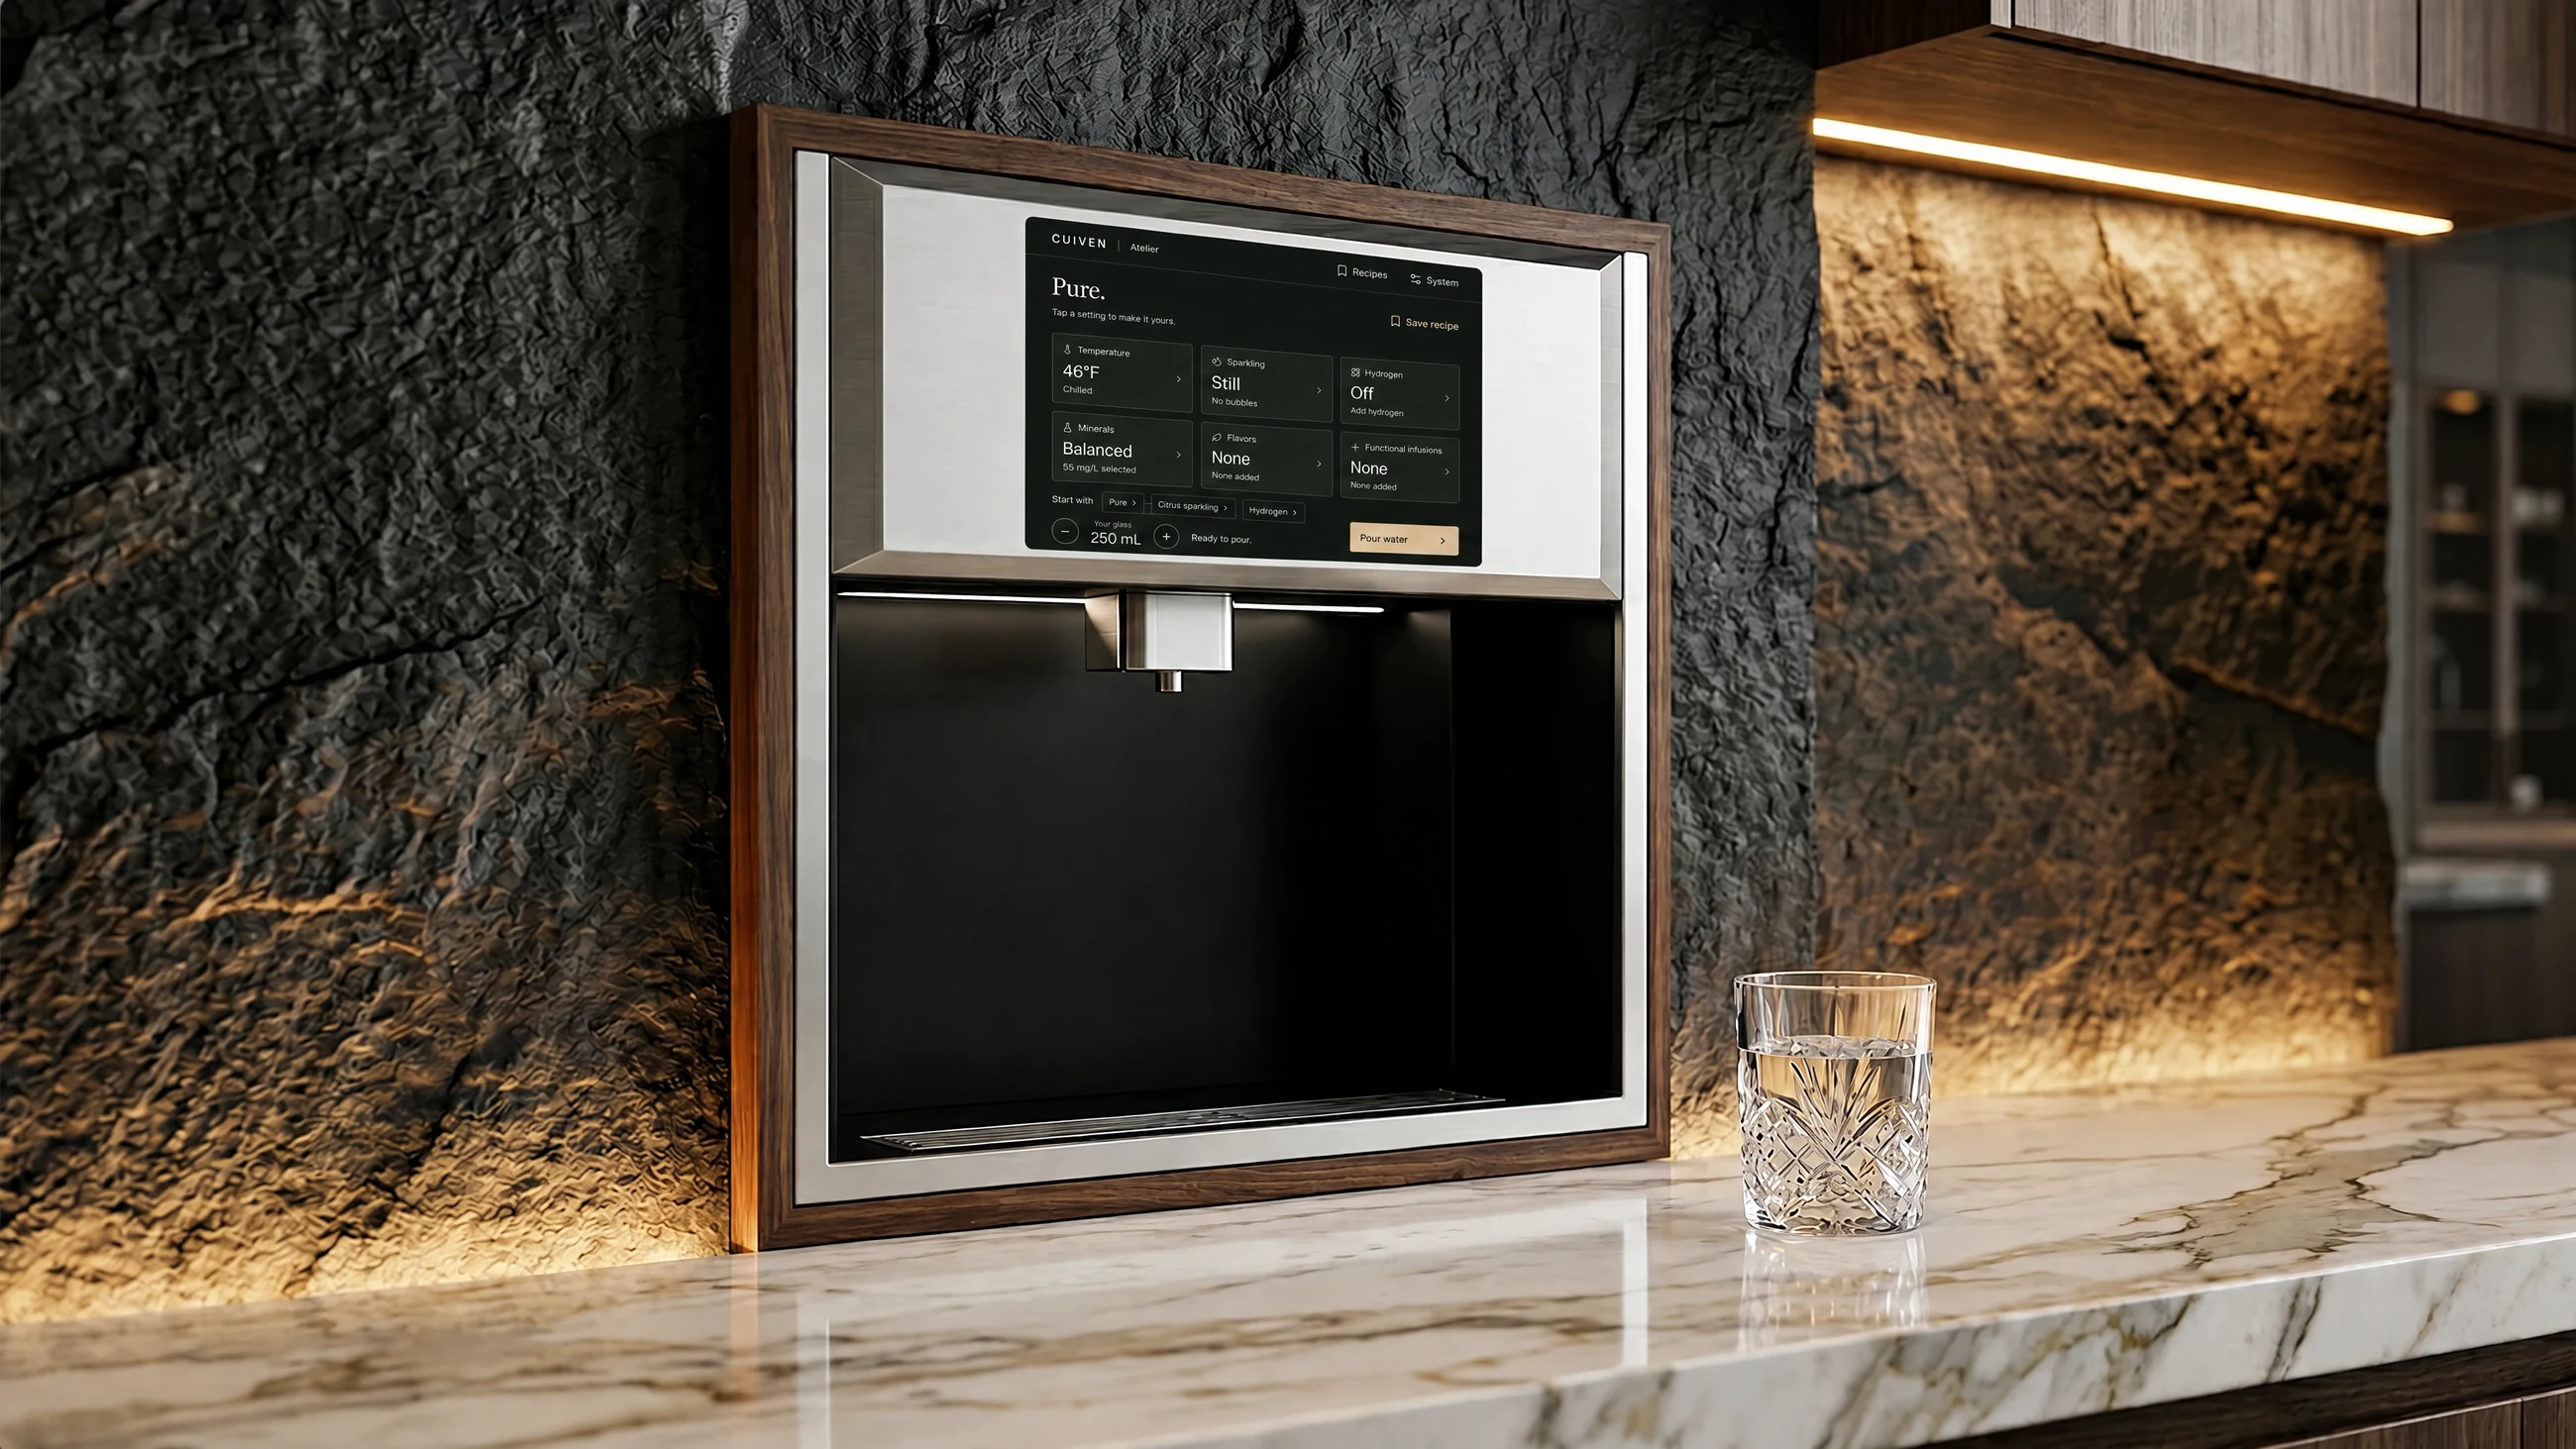
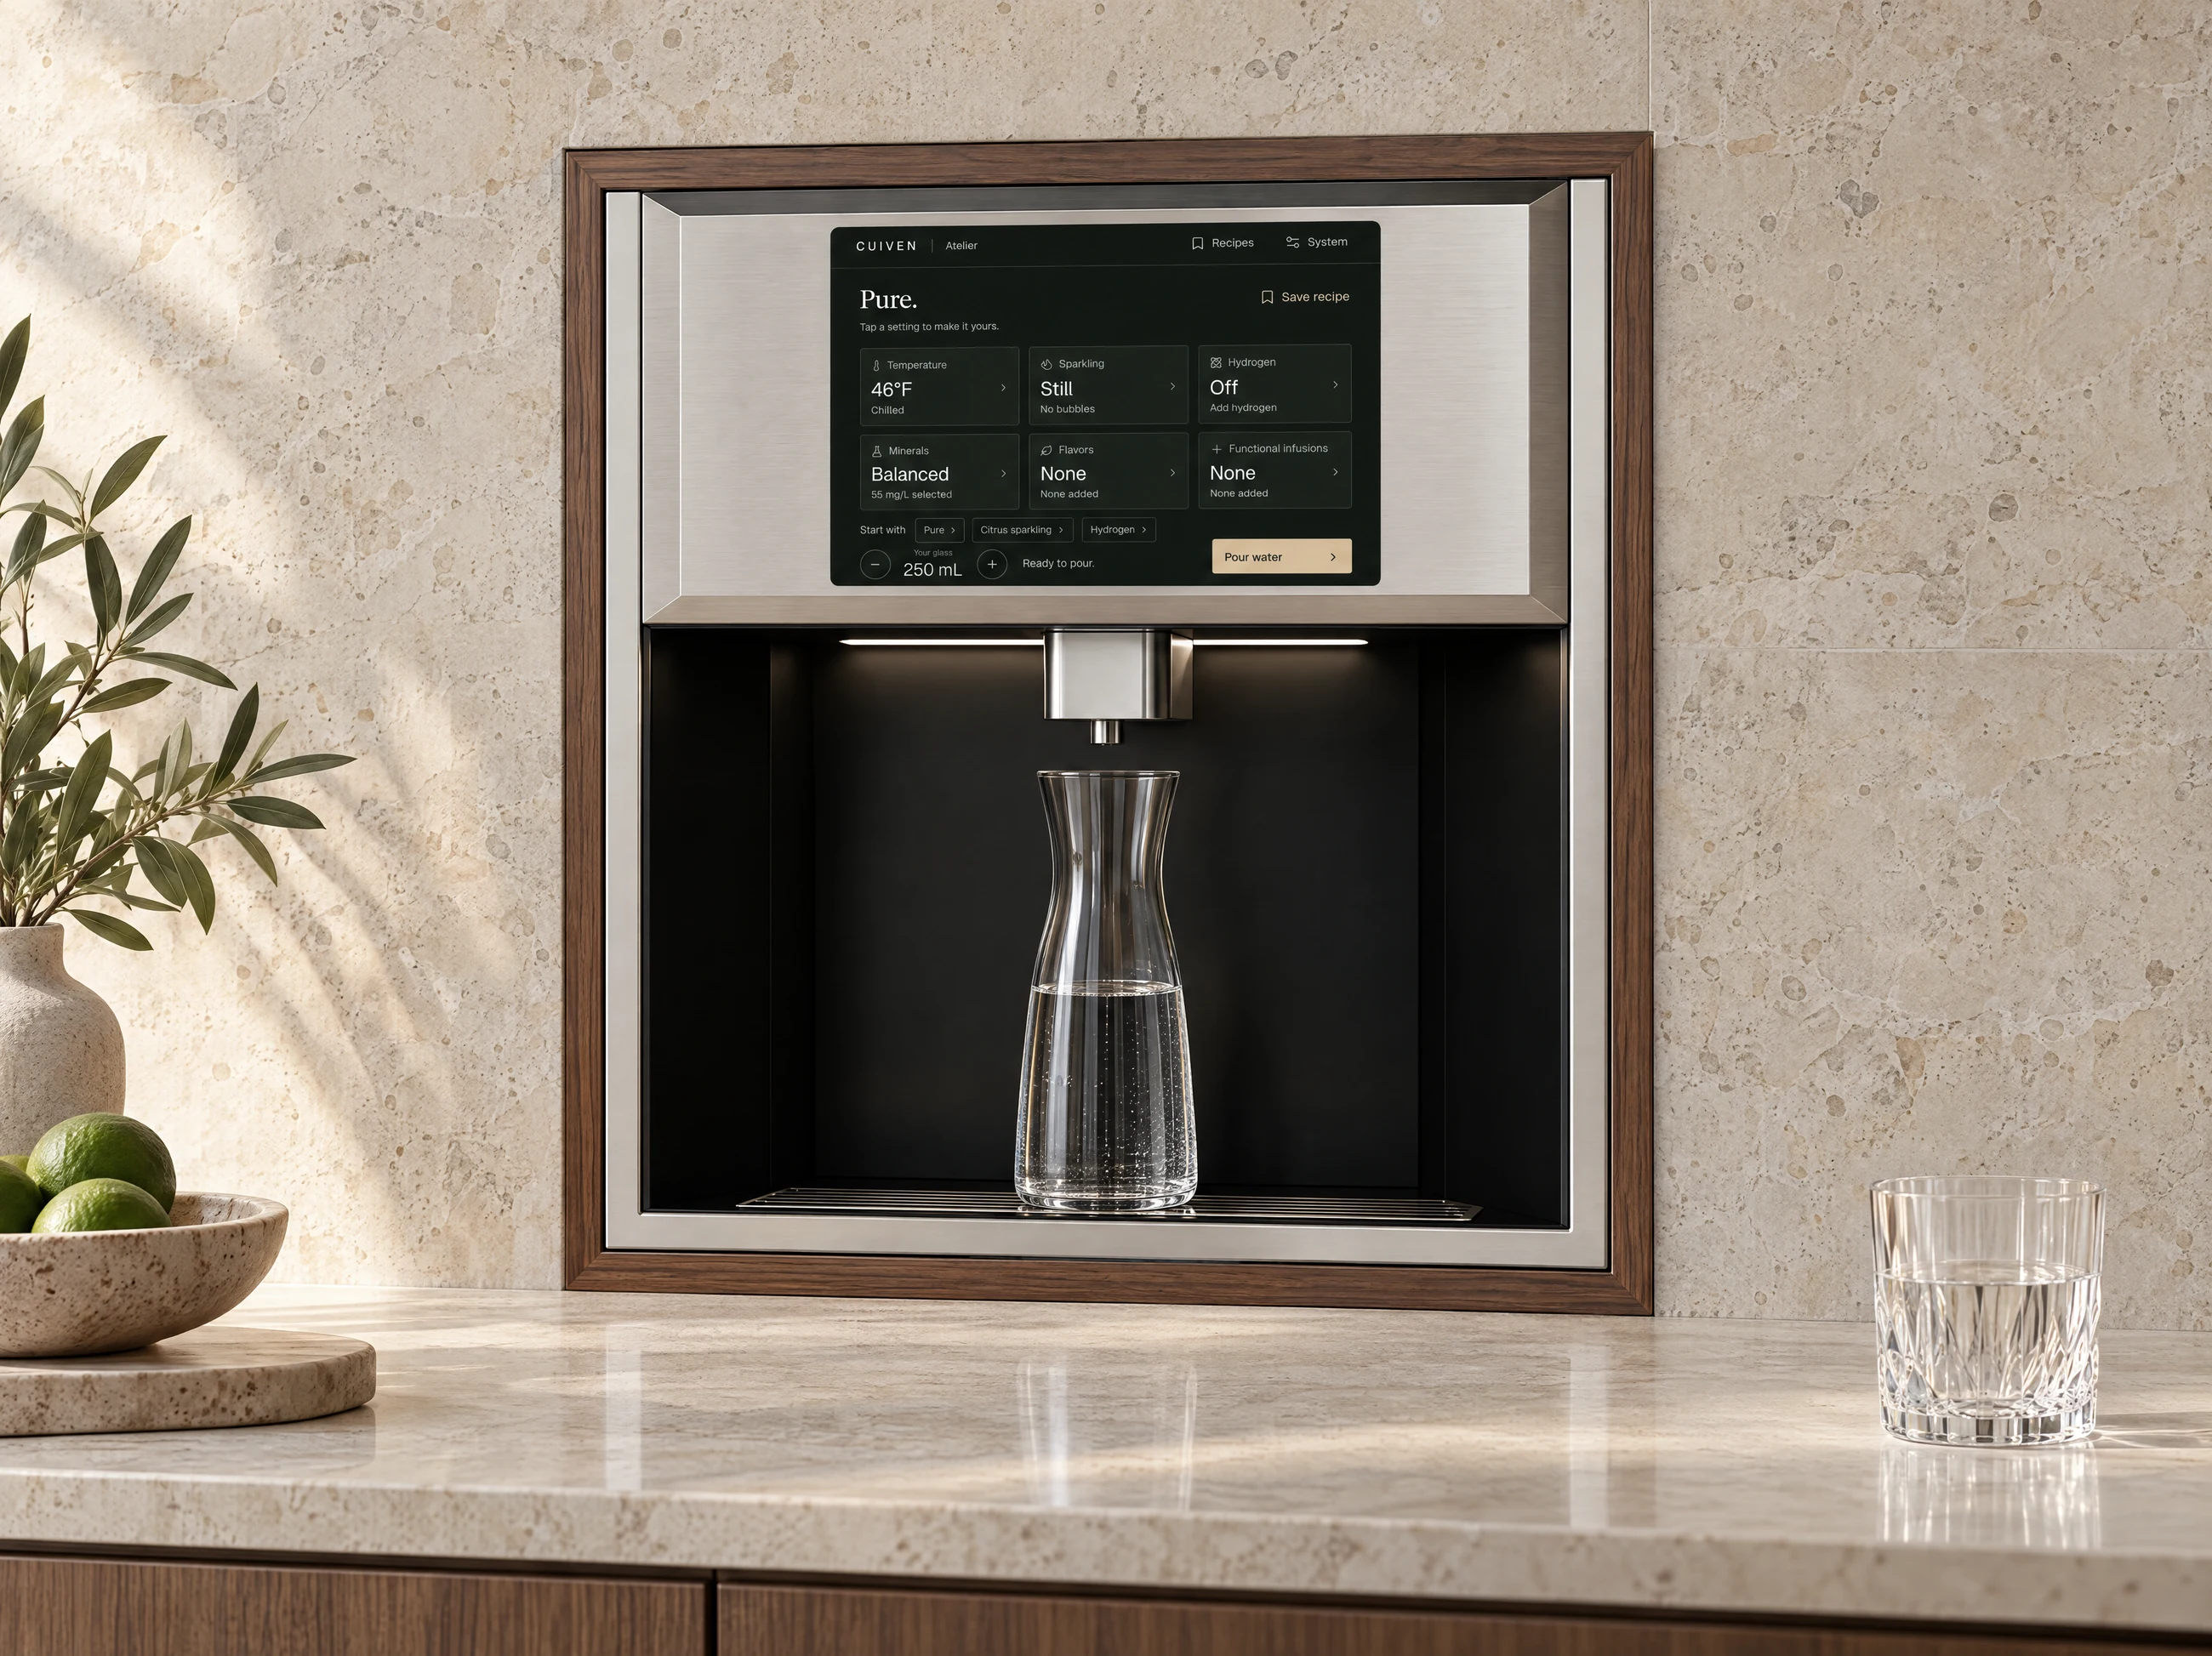
Atelier Built-In integrated flush into stone, with wood trim, an inset screen and a recessed dispensing bay

Integrated into cabinetry

Atelier Built-In

More room for the containers you reach for. Built-In offers greater clearance beneath the outlet and a roomier dispensing bay than Countertop, making space for taller bottles, carafes and pitchers. Integrated into cabinetry or a wall opening, it keeps the work surface clear.

Explore Built-In
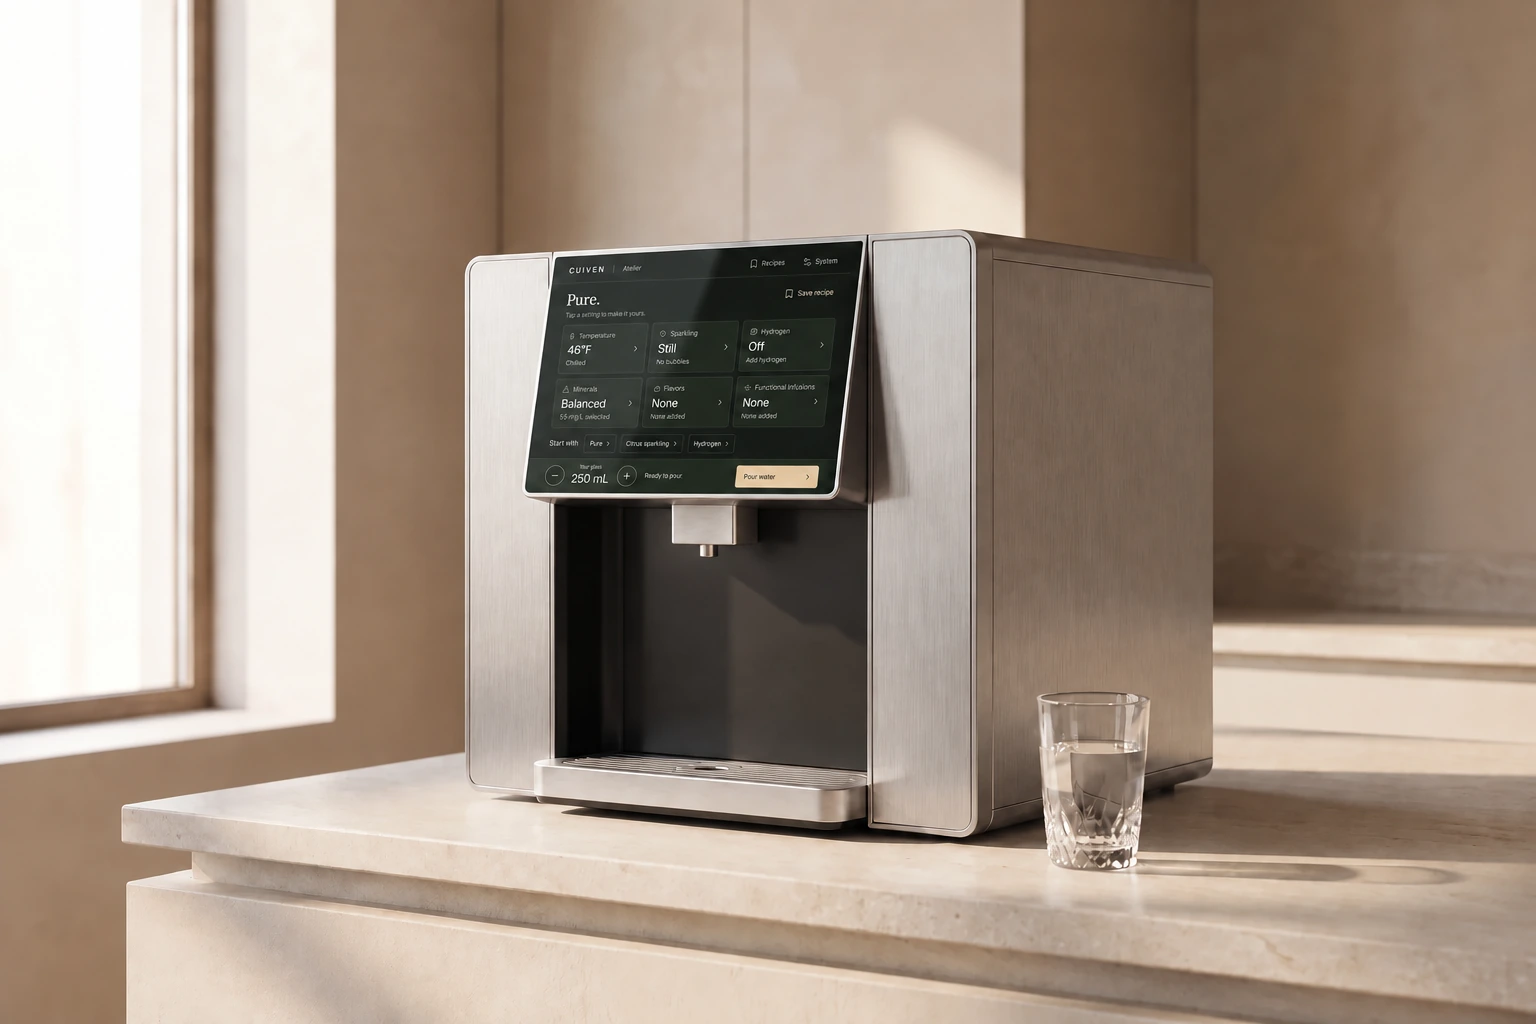
Atelier Countertop, with a black display, shaped metal trim and a dispenser outlet

Installed on the work surface

Atelier Countertop

The dispenser sits on the counter and connects to service equipment in a nearby cabinet. Choose this format when you have counter space but no dedicated appliance opening.

Explore Countertop

Both formats connect to a permanent water supply and drainage. Plan ventilation, utilities and service access into the surrounding cabinetry.

Built-In · Wall & cabinetry

A flush face. A generous interior.

A slim wood frame meets the surrounding finish. The screen sits within the metal fascia, above a deep serving recess. Behind that clean front, the body is concealed within the wall or cabinetry. Both Built-In editions leave more room for bottles, carafes and pitchers.

Wood-trimmed Atelier Built-In integrated into a dark stone wall
Within the wall · Wood trim frames the recessed dispenser.
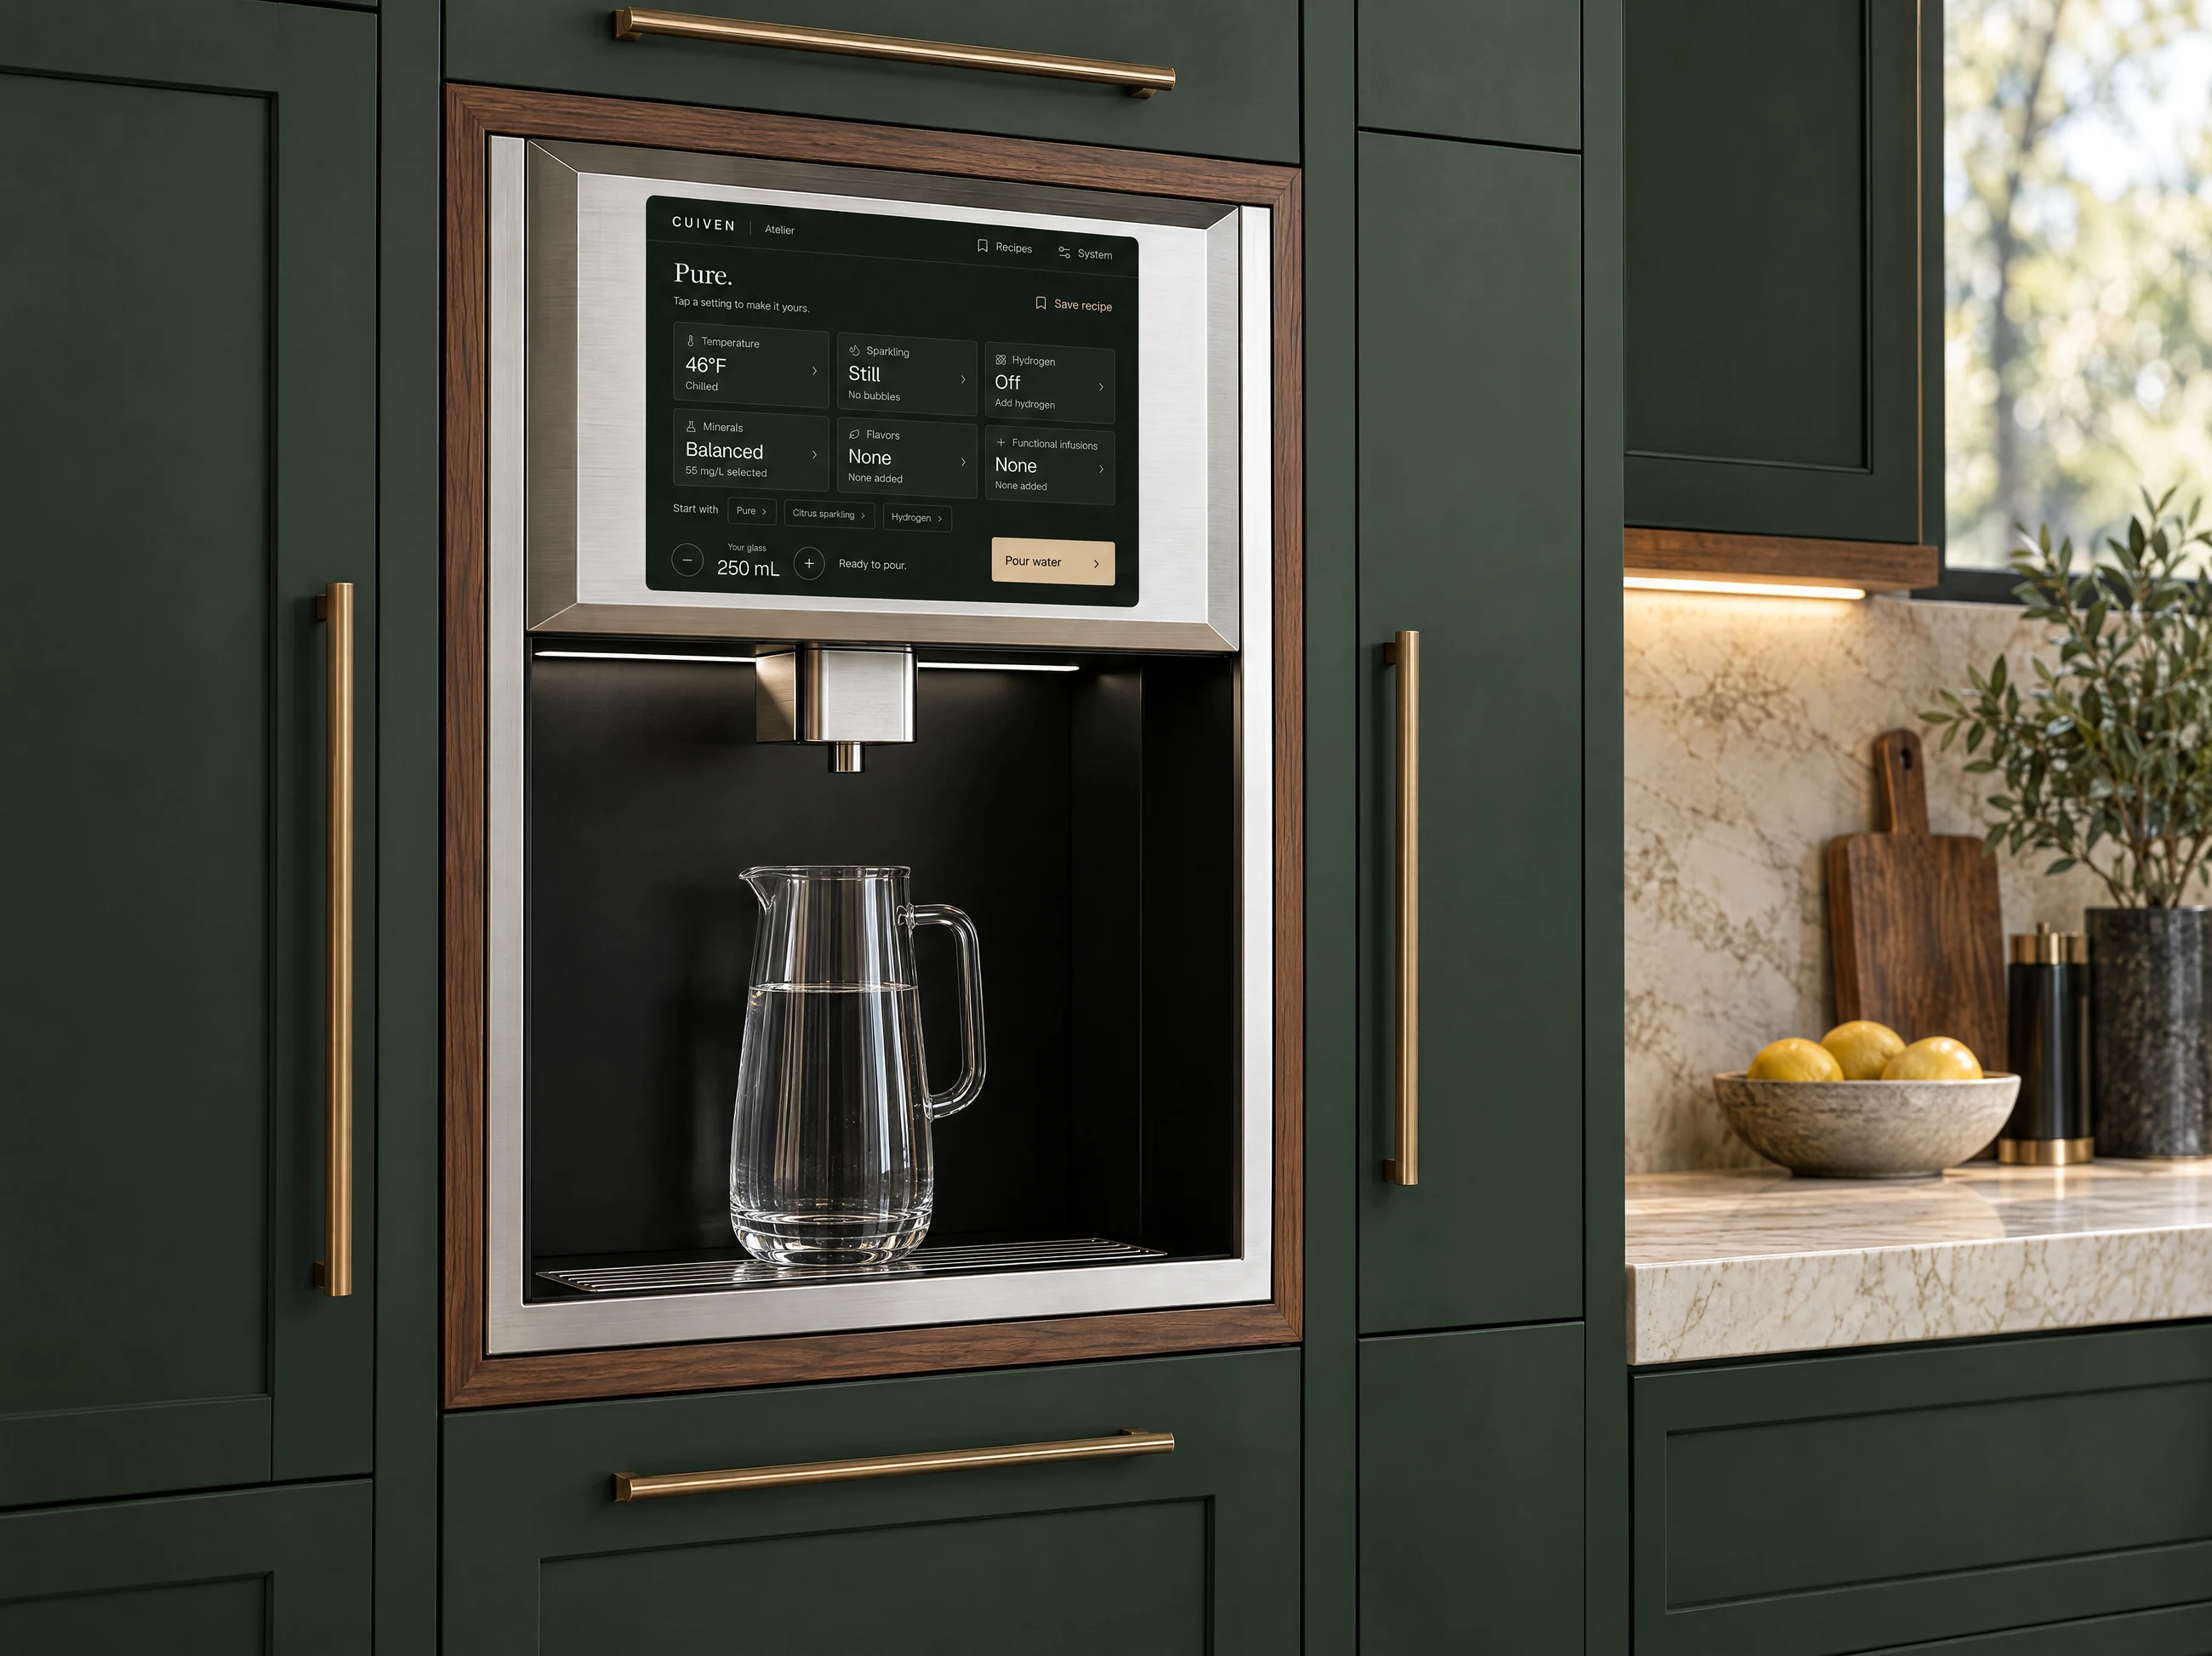
Atelier Built-In integrated flush into green cabinetry, with a pitcher inside the serving bay
Within cabinetry · A continuous front, with room for a pitcher.
Which installation format suits your kitchen?
Planning questionBuilt-InCountertop
Where is the dispenser?Within a suitable cabinet opening.On the work surface.
What space does it use?An appliance position in the cabinetry, with a clear approach to the screen and outlet.Counter space, plus room above and in front for use and cleaning.
How much room is there for a container?Greater outlet clearance and a roomier bay for larger bottles, carafes and pitchers.Compact bay for everyday glasses and bottles.
Where is the equipment?In a nearby cabinet, accessible for service and supplies.In a nearby cabinet, accessible for service and supplies.
What connections are needed?Permanent water supply, drainage, power and ventilation.Permanent water supply, drainage, power and ventilation.
When should I choose it?When you want more room for larger containers and a dedicated cabinet or wall opening.When retaining the cabinet fronts and using an available part of the counter.
What should my designer check?The opening, finished installation height, support and service access.Counter loading, utility routes, surrounding clearances and the service cabinet.

Your water settings

Adjust every detail.
Save every setting.

Choose chilled, room-temperature or hot water and set the amount to pour. Adjust the sparkle or hydrogen level, select a mineral profile, and fine-tune the individual mineral amounts.

Add flavor and functional infusions at your preferred strength. Save the full recipe, including temperature and volume, so the next glass starts with your settings.

Explore the controls

Six settings, one serving

Choose what goes into your glass.

Start with water as you like it, then make individual adjustments. Temperature, bubbles, hydrogen, minerals, flavors and functional infusions each have their own control. Serving size stays separate, so a favorite recipe can become a glass or a larger fill.

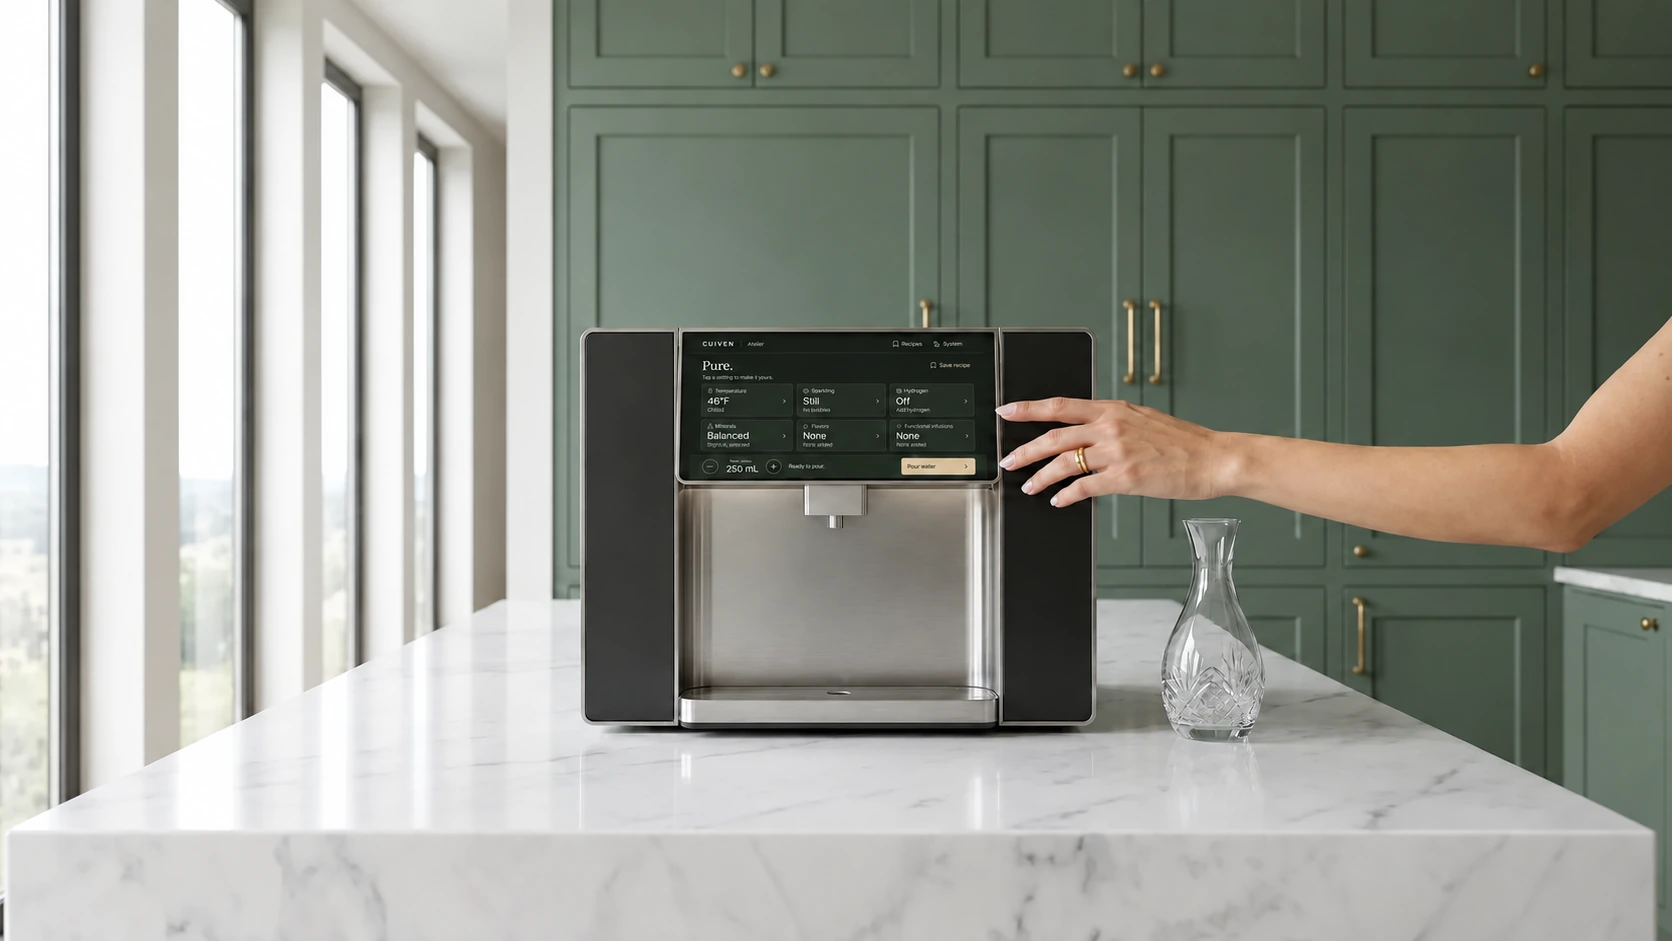
A person using the Atelier Countertop screen beside a glass carafe in a kitchen
Adjust the recipe at the dispenser, with your glass or bottle beneath the outlet.
Temperature
Choose chilled, room-temperature or hot water, then adjust the target. Use Celsius or Fahrenheit. Room temperature leaves the water unheated and unchilled; hot water uses a separate confirmation before pouring.
Sparkling
Keep the water still or increase the carbonation level. Choose a lighter sparkle for a glass with lunch or a stronger one to serve on its own. The setting is shown as a dissolved CO₂ target, in grams per litre.
Hydrogen
Set the dissolved hydrogen target separately from carbonation, or leave it off. Hydrogen uses the still-water setting. Its value is shown in milligrams per litre, so it stays distinct from the sparkle control.
Minerals
Choose a named profile or adjust calcium, magnesium, potassium and sodium individually. Review the amount per litre and the amount in the serving you have selected.
Flavors
Choose lemon, cucumber, mint, ginger, berry or citrus blend. Add a single flavor or combine several, with an individual strength control for each selection.
Functional infusions
Choose from a separate ingredient library and set each selected cartridge’s recipe strength. Keep the water recipe plain, add one ingredient or save a combination you can return to.

Serving size

The recipe and the amount are separate.

Set the serving in millilitres or US fluid ounces. Changing the amount updates the serving while keeping the selected recipe together.

Review the settings before you pour. Stop remains available during a pour, and the screen shows how much has been dispensed.

For hot water, use a suitable cup beneath the outlet and confirm the pour. Child lock and outlet rinse are grouped under System.

Recipes & serving

Save the whole recipe.

A saved recipe includes the temperature, serving size, carbonation, hydrogen, mineral profile, individual mineral settings and every selected infusion strength. Give it a name that makes sense to you.

Start from a house recipe, make a change and save your own version. You can return to that recipe, adjust it for another glass, or replace it with a new combination.

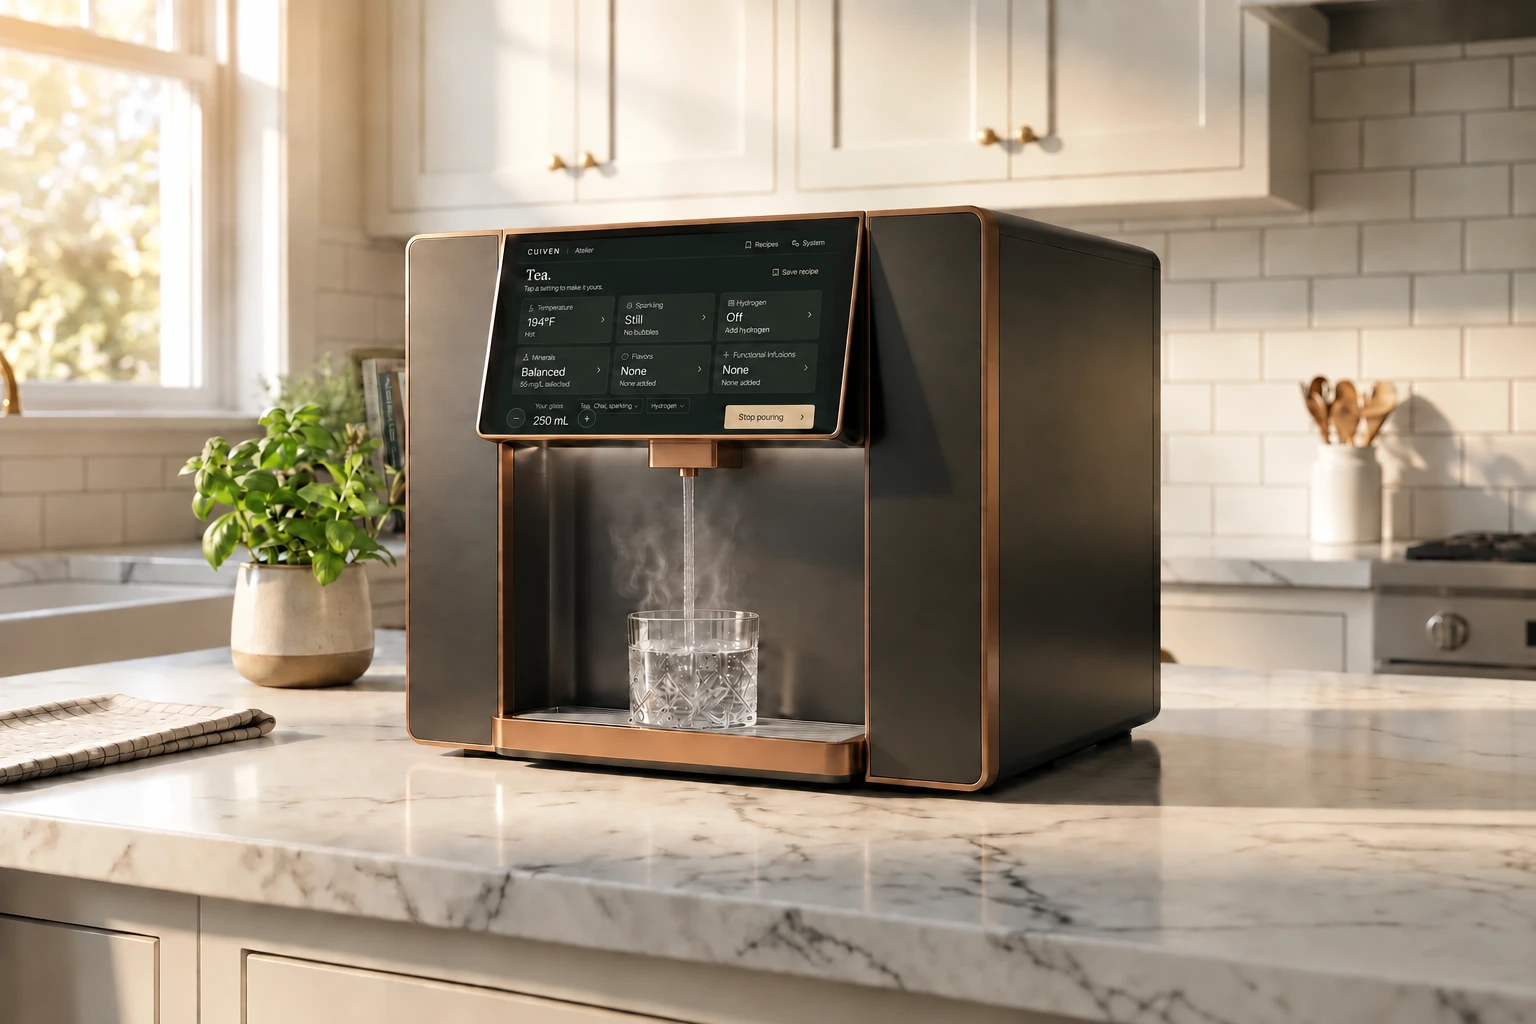
Atelier Countertop dispensing water into a glass beneath its central outlet
Choose a recipe, check the serving size and pour.
Five starting recipes to explore in the controls
RecipeWater settingsWhat to change
PureChilled, still waterSet the serving size and choose your preferred mineral profile.
Citrus sparklingChilled sparkling water with citrus blendAdjust the bubbles and citrus strength independently.
HydrogenChilled, still water with hydrogenSet the hydrogen target and amount to pour.
MintChilled water with mintChoose a lighter or fuller mint strength, or add a second flavor.
Tea waterHot, still waterChoose the temperature and amount for your cup; confirm before pouring.
CUIVENAtelier

Pure.

Tap a setting to make it yours.

Start with

Place a glass before pouring.

Interactive preview

Mineral profiles

A profile to start with. Four controls to refine it.

The mineral menu includes Izumi, Jökla and Alpin, alongside Soft, Balanced, Mineral-rich and None. Select a profile to begin, or use Custom to adjust the individual amounts.

Compare a profile
Select the same serving size when comparing profiles. Review calcium, magnesium, potassium and sodium together rather than relying on the profile name alone.
Make an adjustment
Change one mineral target at a time. The screen switches to Custom and keeps the other values, so you can see exactly which setting changed.
Keep the combination
Save the mineral settings as part of your recipe, together with temperature, bubbles, hydrogen and any infusions. Your next selection recalls that combination.
How to read the mineral controls
On the screenWhat it meansUseful when
mg/LThe selected amount of an individual mineral per litre of water.Comparing mineral settings across different serving sizes.
mg in this servingThe selected concentration applied to your chosen serving volume.Reviewing the mineral amount in the glass you are about to pour.
Selected mineralsThe sum of the four mineral settings shown in the controls.Reviewing your recipe’s mineral settings together.
CustomA profile whose individual mineral settings you have adjusted.Saving a combination under your own recipe name.

The ingredient library

Six flavors. Ten functional infusions.

Keep flavor and functional ingredients separate until you choose to combine them. Each selection has its own strength setting; turning an ingredient off removes it from the recipe without resetting the rest.

Flavors

Choose one flavor or build a blend. Start with a single ingredient, then adjust its strength before adding another.

  • Lemon
  • Cucumber
  • Mint
  • Ginger
  • Berry
  • Citrus Blend

Functional infusions

Review each ingredient in the recipe summary. Use the ingredient label and cartridge instructions when choosing an infusion.

  • Electrolytes
  • Magnesium glycinate
  • Natural caffeine
  • L-theanine
  • Ashwagandha
  • Rhodiola
  • Collagen peptides
  • Vitamin C
  • B-complex
  • Zinc

What does strength mean?

Strength is a percentage of the cartridge’s recipe. It is separate from the mineral and hydrogen targets, which are shown in mg/L. Review the ingredient, its strength and the serving size together when saving a recipe.

The four models

Choose your format and edition.

Countertop and Built-In each come in Atelier and Signature editions. Select a model to include it in your installation enquiry.

Atelier Countertop, with a black display, shaped metal trim and a dispenser outlet

Atelier Countertop

Atelier edition. A counter-mounted dispenser connected to service equipment in nearby cabinetry.

Dispenser
On the counter
Edition
Atelier
Service equipment
Nearby cabinetry
Water supply
Permanent connection
Dispensing space
Compact bay for everyday glasses and bottles.
Select this model
Atelier Countertop Signature, with a black display, shaped metal trim and a dispenser outlet

Atelier Countertop Signature

Signature edition. A counter-mounted dispenser connected to service equipment in nearby cabinetry.

Dispenser
On the counter
Edition
Signature
Service equipment
Nearby cabinetry
Water supply
Permanent connection
Dispensing space
Compact bay for everyday glasses and bottles.
Select this model
Atelier Built-In integrated flush into stone, with wood trim, an inset screen and a recessed dispensing bay

Atelier Built-In

Atelier edition. An integrated dispenser with more clearance and serving space than Countertop, for taller bottles and larger containers. Service equipment stays accessible nearby.

Dispenser
Cabinet opening
Edition
Atelier
Service equipment
Nearby cabinetry
Water supply
Permanent connection
Dispensing space
Greater outlet clearance and a roomier bay for larger bottles, carafes and pitchers.
Select this model
Atelier Built-In Signature integrated flush into green cabinetry, with wood trim, an inset screen and a recessed dispensing bay

Atelier Built-In Signature

Signature edition. An integrated dispenser with more clearance and serving space than Countertop, for taller bottles and larger containers. Service equipment stays accessible nearby.

Dispenser
Cabinet opening
Edition
Signature
Service equipment
Nearby cabinetry
Water supply
Permanent connection
Dispensing space
Greater outlet clearance and a roomier bay for larger bottles, carafes and pitchers.
Select this model
Four model names, two physical formats
ModelDispenser formatEditionDispensing spaceInclude in your enquiry
Atelier CountertopInstalled on the counterAtelierCompact bay for everyday glasses and bottles.Select model
Atelier Countertop SignatureInstalled on the counterSignatureCompact bay for everyday glasses and bottles.Select model
Atelier Built-InIntegrated into cabinetryAtelierGreater outlet clearance and a roomier bay for larger bottles, carafes and pitchers.Select model
Atelier Built-In SignatureIntegrated into cabinetrySignatureGreater outlet clearance and a roomier bay for larger bottles, carafes and pitchers.Select model

Behind the dispenser

Make room for the service equipment.

Both formats need cabinet space for the equipment that treats, heats, chills and carbonates the water. Keep it ventilated and accessible for care and replacement.

  1. 01   Dispenser position.
    Allow room for glasses and bottles, and position the screen within comfortable reach.
  2. 02   Cabinet space and connections.
    Plan water supply, drainage, power and ventilation around the equipment in the nearby cabinet.
  3. 03   Maintenance access.
    Keep the equipment and connections reachable after the cabinetry is installed.

Swipe the diagram to see both installation formats.

Countertop and Built-In each connect to nearby service equipment, with water supply, drainage, power, ventilation and front service access.
Each dispenser connects to its own service equipment. Both installation formats need water, drainage, power and ventilation.
View the full-size installation diagram

Living with Atelier

Think beyond the first installation.

A water connection removes the need to refill a reservoir. The equipment still needs accessible cabinetry, routine care and space to replace supplies. Plan those details before the cabinet is filled with storage.

Everyday use
Keep the dispensing area clear, use a vessel suited to the selected temperature, and review the recipe and serving size before starting. Wipe splashes from the exterior with a soft cloth.
Accessible supplies
Keep the service cabinet clear enough to reach filtration, carbonation and ingredient supplies. Record the correct replacement identifiers for your system rather than choosing by appearance.
Shared households
Give saved recipes recognizable names, explain the separate hot-water confirmation, and show other users where to find Stop, Child lock and Rinse.
Help with a change
If the taste, pour or screen behavior changes, record the recipe, affected function and any message before contacting support. Include the model and a photograph of the relevant area.

Installation questions.

Which models offer more room for larger containers?

Atelier Built-In and Built-In Signature have greater clearance beneath the outlet and more space around the container than the Countertop models. The taller, roomier bay accommodates larger bottles, carafes and pitchers in both cabinet and wall installations.

Does Countertop need plumbing?

Yes. Countertop connects to a permanent water supply and drainage, with service equipment in nearby cabinetry. There is no water container to refill.

Does Built-In require cutting a wall?

Built-In fits within suitable cabinetry. Plan the opening, support, utilities, ventilation and service access with your designer or installer. Share your cabinet layout with CUIVEN to discuss the fit.

How do I start planning an installation?

Choose Countertop or Built-In, then add your location and project stage. Include your cabinetry layout and your designer or installer’s details if available.

Can I discuss a US or Canadian project?

Yes. Tell us your city and state or province, the format you prefer and where you are in the design process.

Plan your installation

Choose your Atelier.

Select Built-In or Countertop, then tell us about your cabinetry, location and project schedule.